

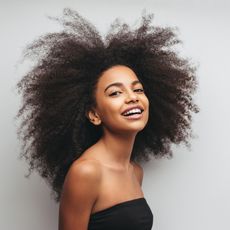
Hi, hello, and welcome to the year of The Glow Up. What’s the glow up, you ask? It’s the before-and-after transformation of your best badass self into your even better badass self, by means of puberty, fame, or, in my favorite of cases, makeovers.
I’m not talking about the elaborate haircutting, glasses-breaking makeovers of your favorite teen movies, but the 2018 version of that: a quick touch-up that leaves you with flushed skin, messy waves, and a glow that whispers, “I slept nine hours last night.”
Lest you think a glow up requires hours of prep and a cosmetology license, however, I got Brittany Sullivan, an Instagram-famous hairstylist and makeup artist known for her glow powers, to turn my boring, regular ol’ self into a come-hither glow monster in a quick, 60-second tutorial. Check out the video, below, then keep reading to find out how to recreate the look on yourself with the exact products she used.

THAT FACE GLOW
1. Fake a flush
Swirl an iridescent powder blush—like Nars Wanted Cheek Palette—over the apples of your cheeks and around your hairline with a fluffy blending brush.
2. Smoke the eyes
Blend a mix of bronzer and blush (Sullivan rubbed an eyeshadow brush across both powders of the Huda Beauty 3D Highlighter Palette for a peachy-bronze mix) over your lids and along your lower lashes to add a matching rosy glow to your eyes.
3. Amp up the brows
Dip an angled eyebrow brush into brow powder (Sullivan used It Cosmetics Brow Power Powder), tap off the excess, and brush the product through your brows in an upwards motion. Comb through them with a clean spoolie to evenly distribute the powder.
4. Conceal it
To keep your face from looking like a hot, flushed mess, neutralize visible redness or dark circles with a creamy, light-reflecting concealer, like It Cosmetics Bye Bye Under Eye Illumination Concealer. Tap it under your eyes and along your cheekbones for shine.
5. Add the glow
Now for the pièce de résistance: the highlighter. “Highlighter makes your makeup look lived in, natural, and realistic,” says Sullivan. Though she used Nars Highlighting Powder on me (powder tends to be more shimmery and noticeable), you can also use a cream highlighter for a more subtle effect.
Blend the formula over your Cupid’s bow, on the very tip of your nose, up the bridge of your nose, over your brow bones, and on in the inner corners of your eyes.
6. Pump the lashes
Curl your lashes, then layer on two thick coats of a volumizing mascara, like Too Faced Better Than Sex Mascara, to the upper lashes, and one coat to the lower lashes.
7. Dab some gloss
Tie the makeup together with a sheer layer of glossy lip balm—nothing too shiny or too pigmented; you just want a soft, dewy sheen across your lips. Sullivan used Tarte Amazonian Butter Lipstick on me.
THAT HAIR GLOW
1. Get some grip
Spray your hair, from root to tip, with a heat-protectant spray, like Amika The Shield Style Extending Spray. If your hair is slippery clean, make sure to also mist on a soft-hold hairspray to give it some texture and grip. Too-clean hair is, surprisingly, harder to work with, so you can keep re-spraying sections as you curl.
2. Clamp it
Scoop up and clip the top half of your hair with hairstyling clips as you work on the lower sections. And remember: “Don’t worry about anything looking too polished,” says Sullivan. “You want the hair to look a little messy and textured.” You may now go forth and curl.
3. Curl it up
The key to natural-looking curls and waves is to make sure you alternate the direction in which you curl each section so they don’t clump together.
Wind two-inch sections of hair around a one-and-a-quarter-inch curling iron—twisting the hair backwards for one section, then forwards for the next section—hold for five seconds, and release. Sullivan swears by the cult-favorite Hot Tools 1-1/4” Curling Iron.
4. Flatten them
After you’re finished curling, run a flat iron (like the Ghd Platinum Professional Performance Styler) over the ends of your waves “to break up the texture and give the whole hairstyle a relaxed feeling,” says Sullivan.
5. Deconstruct it
After your hair completely cools, give it a final blast of hairspray, and rake your fingers through the curls to lightly mess them up. Side-part your hair, center-part it, flip it over and muss it up with your fingers—whatever. Just get that texture in there to make it look lived-in and chill. Then take a billion selfies, because you just had your first damn glow up, bb.
(Psst: These were the hair products used)
-
 Curiously, Just as Meghan Markle Sends Samples of Her New Strawberry Jam Out, the Buckingham Palace Shop Starts Promoting Its Own Strawberry Jam on Social Media
The clip promoting the Buckingham Palace Shop’s product—we cannot make this up—is set to Mozart’s “Dissonance Quartet.”
-
 Zendaya's Latest 'Challengers' Serve Is Nearly a Century Old
The 1930s-era dress may have been pulled months ago.
-
 Don't Be Scared to Get a Rook Piercing
Here's everything you need to know.


-
 Rosemary Oil for Hair Growth: Does It Really Work?
The natural remedy went viral, but it's not a miracle worker.
-
 The 32 Best Hair Growth Shampoos of 2024, According to Experts
Rapunzel hair, coming right up.
-
 The 12 Best Deep Conditioners for Curly and Natural Hair, According to Hairstylists and Editors
Fight damage and frizz, rain or shine.
-
 The 20 Best Hair Masks for Damaged Hair, According to Experts and Editors
Healthy strands, here we come!
-
 How Often You Should Wash Your Hair, According To Experts
Keep it fresh, my friends.
-
 The 11 Best Magnetic Lashes of 2023
Go ahead and kiss your messy lash glue goodbye.
-
 Beauty Advent Calendars Make the Perfect Holiday Gift
The gift that keeps on giving.
-
 The 18 Best Natural Hair Products in 2023
Remember: Your curls are your crown.


